Clients
Adding Clients
To add a new client to your account:
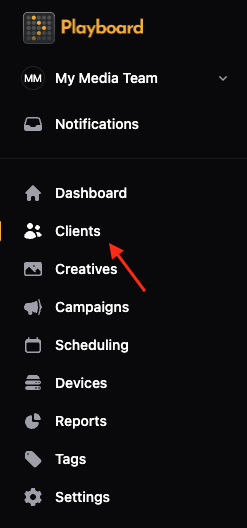
- Open the Clients page
- From the left sidebar, click Clients.
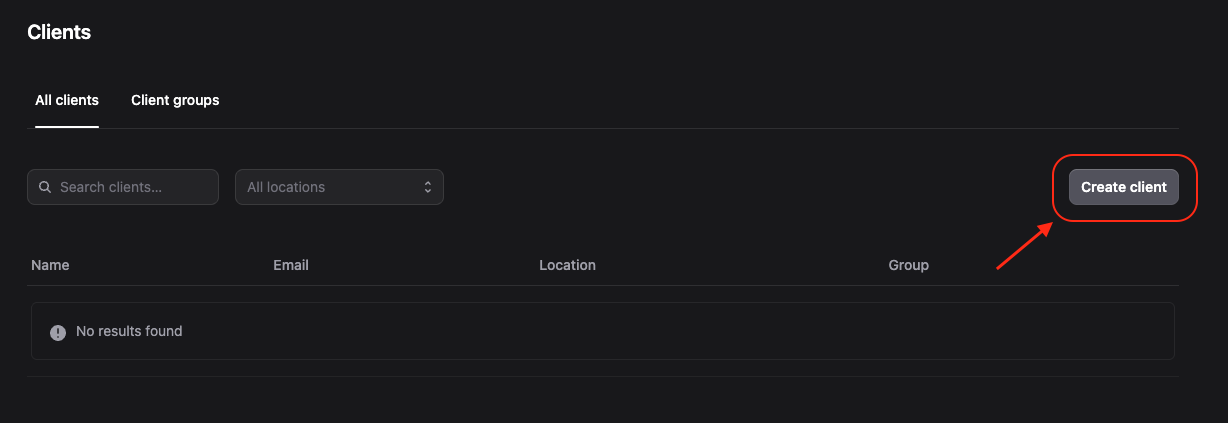
- Click "Create client"
- On the Clients page (All clients tab), click the Create client button in the top-right.
- The Add new client modal will open.
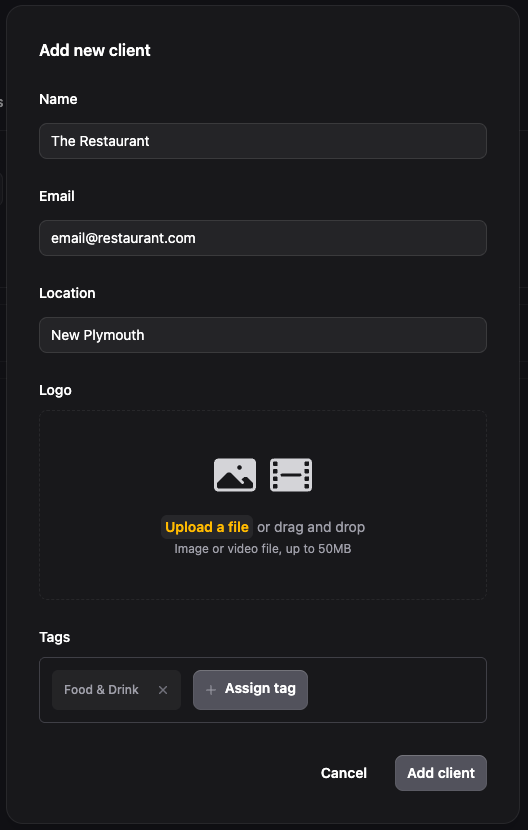
- Fill in the client details
- Name: Enter the client or company name (e.g., The Restaurant). Required
- Email: Add a contact email for the client (for notifications/invoices, if needed). Required
- Location: Enter city, address, or street name. Required
- Upload a logo (optional)
- Click Upload a file or drag & drop an image/video into the logo box.
- File limits: image or video up to 50 MB. Preferred: PNG/JPG for logos.
Tip: Use a 1x1 square image for best display in lists and overlays.
- Assign tags (optional)
- Click in the Tags field and select existing tags (e.g., Food & Drink) or create a new tag if available.
- Tags assigned to a client will be automatically added to creatives when you assign that client to a creative.
- Configure integrations (optional)
- If you have integrations enabled (e.g., Canva), you can toggle them on for this client.
- This allows the client to use integrated features when assigned to creatives.
- Save the client
- Click Add client to save.
- After saving, confirm the new client appears in the Clients list and that the details (email, location, tags) are correct.
Note: You need an active subscription to create clients. If you don't have an active subscription, you'll see an error message when trying to create a client.
Editing Clients
To edit an existing client:
- Open the client menu
- Find the client you want to edit in the Clients list.
- Click the three dots (⋯) menu on the right side of the client row.
- Select Edit
- Click Edit from the dropdown menu.
- The Edit client dialog will open.
- Update client details
- Modify any fields you want to change (Name, Email, Location, Logo, Tags, or Integrations).
- Click Save changes to confirm.
Deleting Clients
To delete a client from your account:
- Open the client menu
- Find the client you want to delete in the Clients list.
- Click the three dots (⋯) menu on the right side of the client row.
- Confirm deletion
- Click Delete from the dropdown menu.
- A confirmation dialog will appear.
- Review the warning message and click I'm sure, delete client to confirm.
Warning: Deleting a client will not remove related creatives and campaigns. They will still be visible in reports, but they will no longer be associated with this client.
Client Groups
Clients can be organised into client groups. This is useful for multiple departments within a client organisation, or an agency partner with multiple clients.
Creating a Client Group
To create a new client group:

- Go to Client Groups tab
- On the Clients page, click the Client groups tab at the top.
- Click "Create group"
- Click the Create group button.
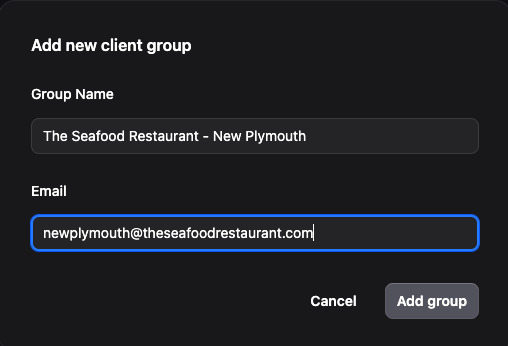
- The Add new client group modal will open.
- Fill in group details
- Group Name: Enter a name for the group (e.g., "Restaurant Chain - North Region"). Required
- Email: Add a contact email for the group. Required
- Save the group
- Click Add group to save.
Adding Clients to a Group
To add clients to an existing group:
- Open the group
- Click on a client group from the list to view its details.
- Add client
- Click the Add client button.
- Select a client from the dropdown (clients already in the group are hidden).
- Click Add client to confirm.
Managing Client Groups
To manage an existing client group:

- Edit group
- Click the three dots (⋯) menu next to a group and select Edit to change the group name or email.
- Remove client from group
- Click the × icon next to a client in the group to remove them.
- Delete group
- Click the three dots (⋯) menu and select Delete to remove the entire group (clients in the group are not deleted).
